

Hello Everyone,
In this blog we will learn how to install Return Management in Magento 2?
This extension was approved by Magento Marketplace.
This Extension allows your customers to return their purchased order. This order return management is a process for customers who wish to return or exchange a product after purchasing an order.
This includes liaising with customers, collecting their purchased items, updating inventory and its management, updating accounts and, in case of exchange, packaging and shipping the exchanged item.
Admin can create customizable fields for Request New RMA form. Different types of fields can be created like radio buttons, dropdown, checkboxes. Additional fields allow the administrator to get more information from customers. Customers can send images of damaged products.
Without wasting your time, let us guide you straight away. Follow the easy step given below to install the Magento 2 RMA extension and to Configure it.
WHAT ARE THE FEATURES OF RMA ?
- Enable or disable from Magento admin.
- Admin can create customizable fields for RMA request form.
- Guest customers are also allowed to generate RMA.
- View the list of return requests.
- Manage RMA Request List, Resolution, Status, Condition and Reason.
- The admin can select the allowed product types for RMA.
STEPS FOR INSTALL RMA IN MAGENTO 2
STEP 1: Extract downloaded extension package in your magento root folder using FTP(File Transfer Protocol) Tools. For verification of root folder you can see some folders inside magento root folder like app,bin,lib,php server and vendor etc.
STEP 2: Next Need to run some magento commands to install extension in your system , so connect with your server via SSH and go to magento root folder (e.g : cd /var/www/html/magento243) and run below commands one by one.
⦁ php bin/magento setup:upgrade
⦁ php bin/magento setup:static-content:deploy-f
⦁ php bin/magento indexer:reindex
⦁ php bin/magento cache:clean
⦁ php bin/magento cache:flush
⦁ chmod-R 777 var/ pub/ generated/
STEP 3: If all your commands run successfully then login to your system Admin Panel and goto Store > Configuration , if you will see a new Tab in the left side bar with MageCurious Logo it means extension installed successfully.
STEPS FOR CONNECT RETURN MANAGEMENT CONFIGURATION WITH MAGENTO 2
1:- To Configure Extension go to Stores -> Settings -> Configuration -> Magecurious -> Return Management.
2:- General Configuration.

- Enable:- Enable or Disable Module.
- Status for RMA:- You can see the dropdown of new rma status that is set from admin.
- After Confirmation status for RMA:- You can see the dropdown of after confirmation status for RMA that is set from admin.
- Label of Shipping Confirmation:- Set Custom Label of Shipping Confirmation.
- Text of Shipping Confirmation:- Custom Text of Shipping Confirmation.
- Want to Return from Order Grid:- Select Yes / No to show Return Option from Order Grid.
- Want to Return from Order Detail:- Select Yes / No to show Return Option from Order Detail.
- Return Policy Duration:- Set the Return Policy duration.

- Greatest size of attachment (Picture) in MB:- Set the Picture Size of Uploaded Image in MB.
- Permit to request if order status is from:- Permit RMA request of selected order status.

- New RMA Email Templates:- Email Template for new RMA Request.
- RMA Comment Templates:- Email Template for RMA Comment.
- Name of RMA Department:- Set the Name of RMA Department.
- Email of RMA Department:- Set Email of RMA Department.
- Address of RMA Department:- Set the Address of RMA.
3:- BACKEND CONFIGURATION
- Resolutions:- You can add a new Resolution from the “Add New Resolution” Button, after adding you can see the grid below like this.

Add New Resolution

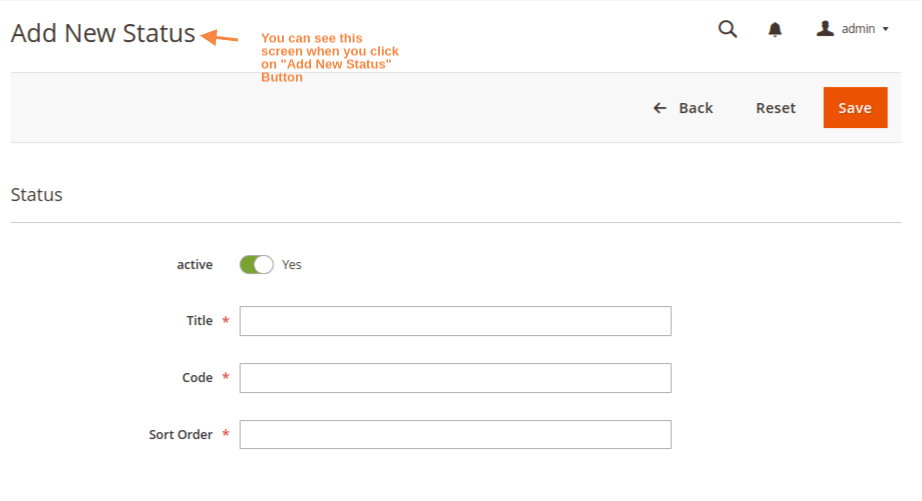
4:- Status – You can add a new Status from the “Add New Status” Button, after adding you can see the grid below like this.

Add New Status
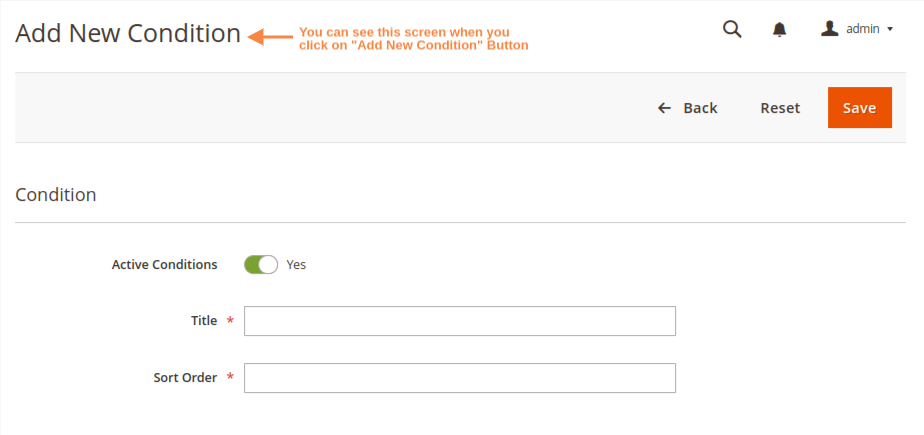
5:- Conditions – You can add a new Condition from the “Add New Condition” Button, after adding you can see the grid below like this.

Add New Condition
6 : Reasons – You can add a new Reason from the “Add New Reason” Button, after adding you can see the grid below like this.
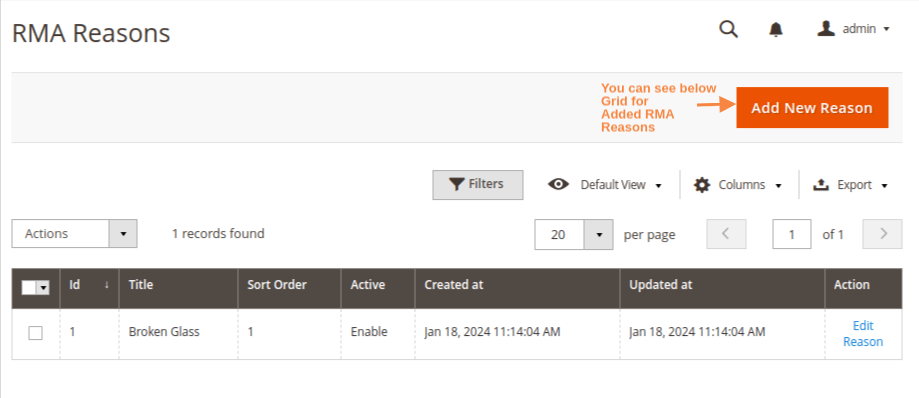
Add New Reason

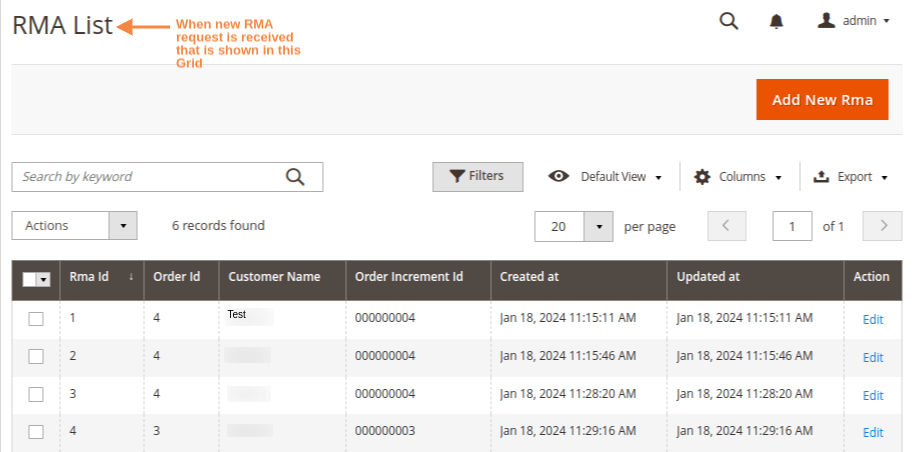
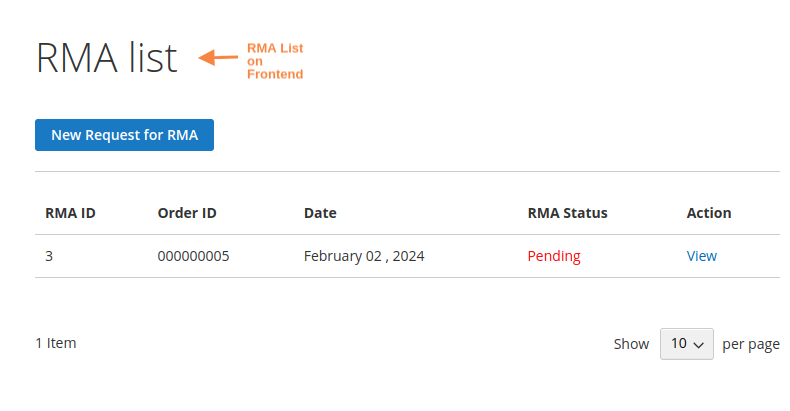
7 : RMA List
Frontend Functionality
My Account -> RMA -> RMA List
Customer can Manage Return from here.
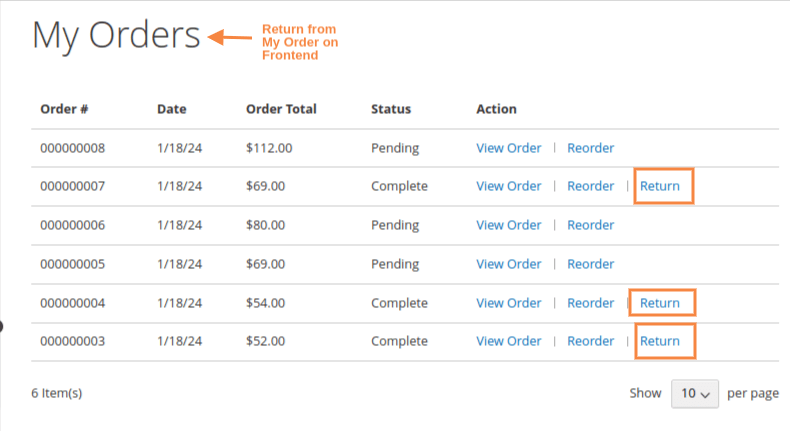
My Account -> My Orders
Customers can return from My Order Section.
New Request for RMA.

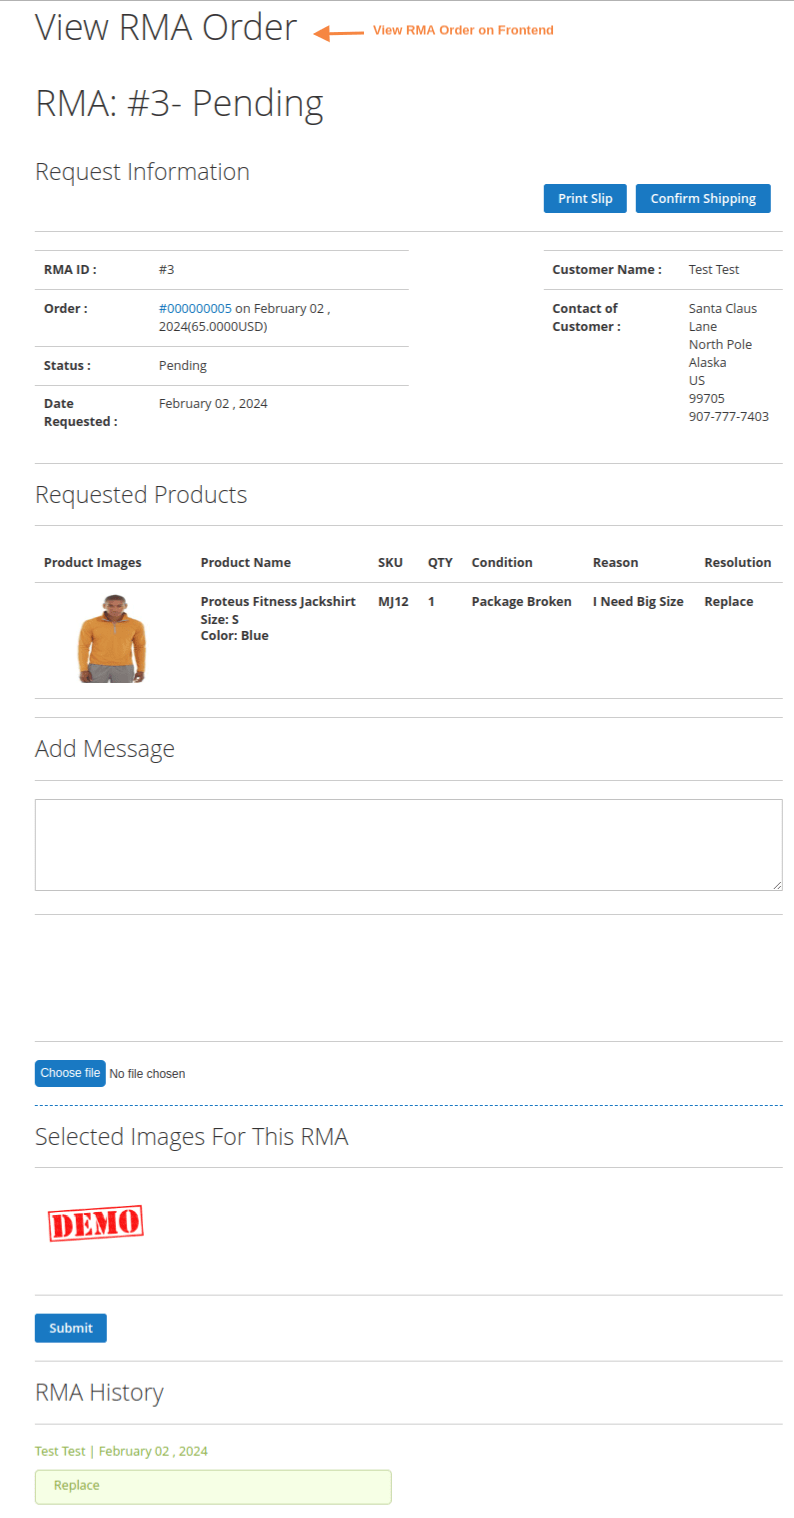
View RMA Order.
View RMA Order on Admin.

Final Thoughts:
So this was the easiest way which we have told you in this blog. This is how you can install RMA in Magento 2. Hope you liked the blog.
So quickly go to the comment box and tell me how you like this blog?
Stay tuned with us on our site to get new updates of Magento.
Thanks for reading and visiting our site.