

Hello Everyone,
In this blog we will learn how to configure the minimum advertised price in Magento 2?
Without wasting your time, let us guide you straight away. Follow the easy step given below to edit your details in magento 2.
STEPS FOR CONFIGURE MINIMUM ADVERTISED PRICE IN MAGENTO 2.
Step 1: First go to the Magento 2 store Admin Panel and login.
Step 2: Now go to the menu bar on the side. Click on the Stores > Settings > Configuration.
Step 3: Now click on the Sales option below the Sales option.
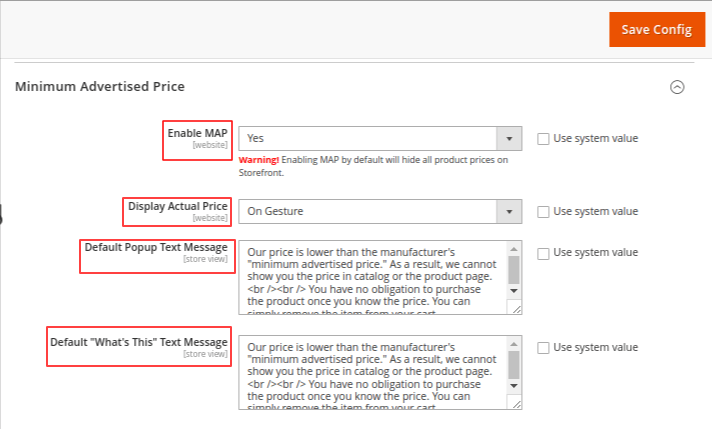
- Enable MAP: Select the YES for enabling the MAP (Minimum Advertised Price)
- Display Actual Price: For displaying to the buyers, Select according to your requirement from On Gesture, In Cart or Before Order Confirmation.
- Default Popup Text Message: Add the text for Popup Text Message display accordingly.
- The default “What’s This” Text Message: Add a clear explanation that is easy to understand by the buyers.
- Now Save the Configuration.
Step 4: Implementing the MAP for specific products.
Now go to the menu bar on the side. Click on the Catalog > Products
From the Product Management Grid tap on Edit and click on Advanced Pricing.
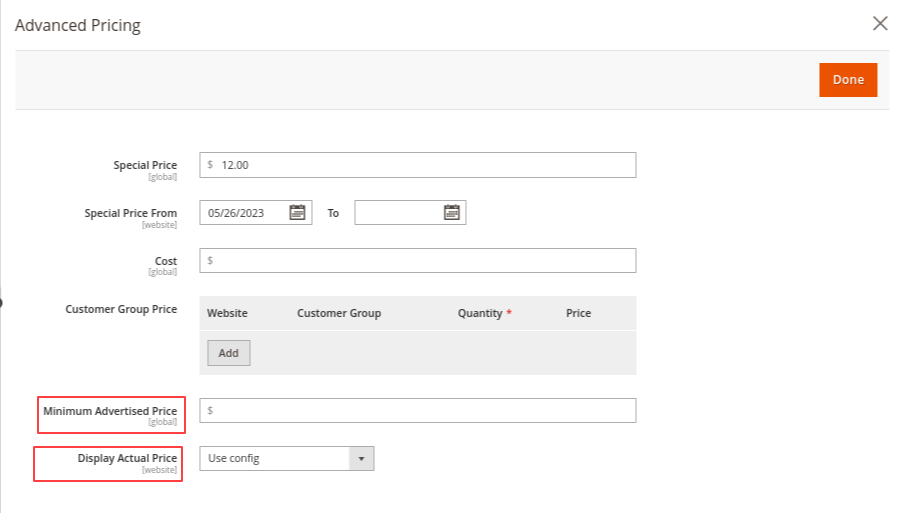
- Import the number of Manufacturer’s Suggested Retail Price.
- Select the Display Actual Price according to your requirement from
- Choose the Display Actual Price by CMS Block Use config, On Gesture, In Cart and Before Order Confirmation
- Now Save the Configuration.
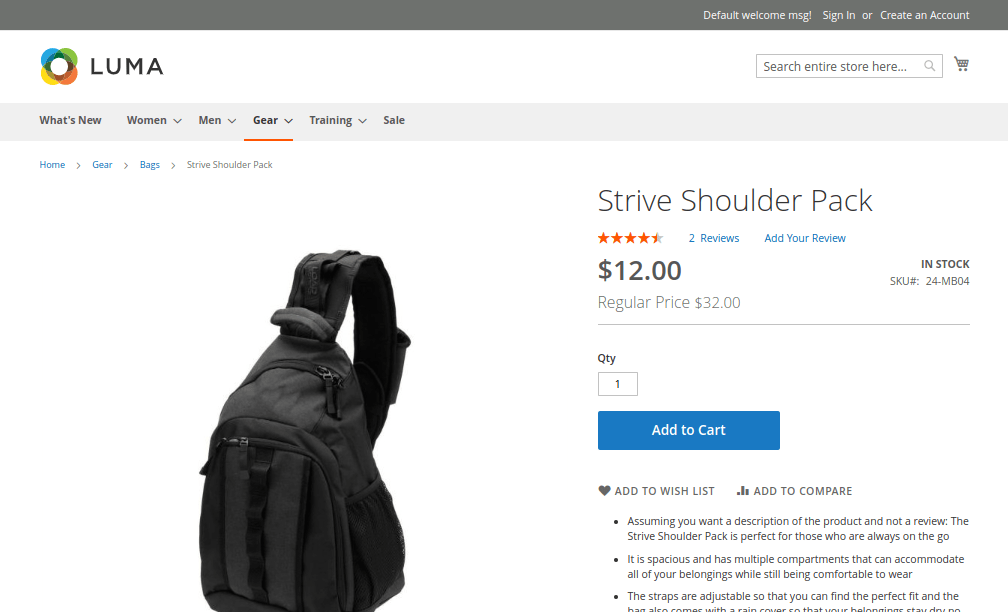
Frontend Display of Minimum Advertised Price
Final Thoughts:
So, This was the easiest way which we have told you in this blog. This is how you can configure checkout options in Magento 2. Hope you liked the blog.
So quickly go to the comment box and tell me how you like this blog?
Stay tuned with us on our site to get new updates of Magento.
Thanks for reading and visiting our site.