
Hello Everyone,
In this blog we will learn how to install google cloud storage extension in Magento 2?
This extension was approved by Magento Marketplace.
Magento 2 Google cloud storage extension allows store owner to transfer their magento store media storage from local or hosted server storage to Google Cloud Storage and upload it to google cloud server and whenever they need extension will fetch all stored media’s from google cloud server to appropriate hosted server including all catalogues like products main images,cache images,category main and cache images,downloadable files too…
Without wasting your time, let us guide you straight away. Follow the easy step given below to install Magento 2 Google Cloud Storage extension and to Configure it.
WHAT ARE THE FEATURES OF GOOGLE CLOUD STORAGE ?
- Easy UI To Use Google Cloud Storage With Your Store.
- Upload all Store Media’s To Google Cloud Storage.
- Fetch all Store Media’s From Google Cloud Storage.
- Downloadable Product Link Upload And Fetch From Google Cloud Storage.
- Downloadable Product Link Encryption.
- Upload Catalog Images And Files To Google Cloud Storage.
- Direct Saved Category And Product Image To Google Cloud Storage.
- Export Already Exist Media From Local or Hosted Storage To Google Cloud Storage .
- Improve your store performance by getting all media (like images) from Google Cloud Server.
STEPS FOR INSTALL GOOGLE CLOUD STORAGE IN MAGENTO 2
STEP 1: Extract downloaded extension package in your magento root folder using FTP(File Transfer Protocol) Tools. For verification of root folder you can see some folders inside magento root folder like app,bin,lib,php server and vendor etc.
STEP 2: Next Need to run some magento commands to install extension in your system , so connect with your server via SSH and go to magento root folder (e.g : cd /var/www/html/magento 243) and run below commands one by one.
- php bin/magento setup:upgrade
- php bin/magento setup:static-content:deploy -f
- php bin/magento indexer:reindex
- php bin/magento cache:clean
- php bin/magento cache:flush
- chmod -R 777 var/ pub/ generated
STEP 3: If your all commands run successfully then login to your system Admin Panel and goto Store > Configuration , if you will see a new Tab in the left side bar with MageCurious Logo it means extension installed successfully.
STEPS FOR CONNECT GOOGLE CLOUD STORAGE CONFIGURATION WITH MAGENTO 2
Step 1:- Run below command in your magento root before configure extension.
composer require google/cloud-storage
To Configure Extension go to Stores > Configuration > MageCurious Tab > GC Storage
Step 2:-
- Enable GC Storage:- Enable/Disable the GC Storage extension from here.
- Bucket:- Enter GC bucket name to put and get media from GC Storage space.
- Project ID:- Enter the Project ID to put and get media from GC Storage space.
- Private Key:- Enter the Private key to put and get media from GC Storage space.
- Private Key ID:- Enter the Private Key Id to put and get media from GC Storage space.
- Client Email:- Enter the Client Email Address to put and get media from GC Storage space.
- Client Id:- Enter the Client Id to put and get media from GC Storage space.
- Region:- Select your GC Storage region from the given drop-down.

- Request Timeout:- Set Request Timeout and this field will set downloadable product link url expiration time . Eg if you set 1000 then the downloadable product link url will expire after 1000 seconds . And you need to generate the url again from My Account Section.
- Enable Custom Endpoint:- Set it yes if you want to add or use custom endpoint url for your GC storage e.g : if you are using Digital Ocean Compatibility with GC than you can set it to yes and add custom endpoint in below here
- Custom Endpoint:- Set your custom endpoint url for GC storage access here. This will only enable if you choose Enable Custom Endpoint To Yes.
- Export Local Media To GC:- Click here to export all your local media including images , pdf files etc. To GC Storage .
- Make sure you have disabled the GC storage extension before exporting media from local storage.
WHAT ARE THE FEATURES OF GOOGLE CLOUD STORAGE ?
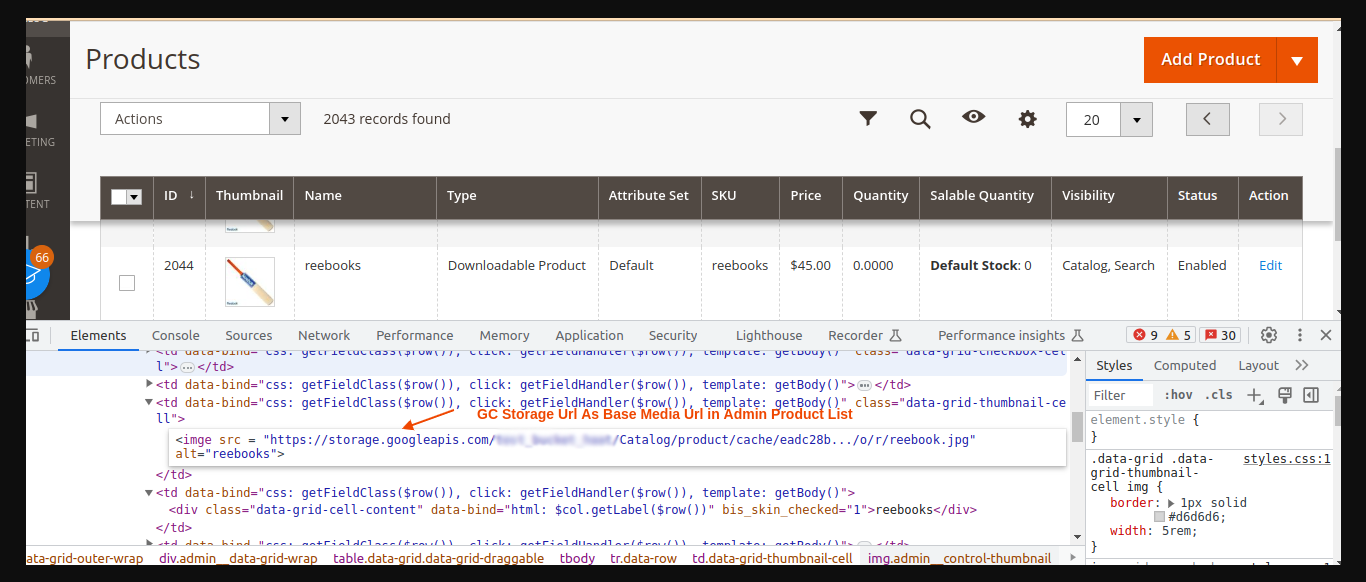
- GC Storage Url At Admin Product List Page.
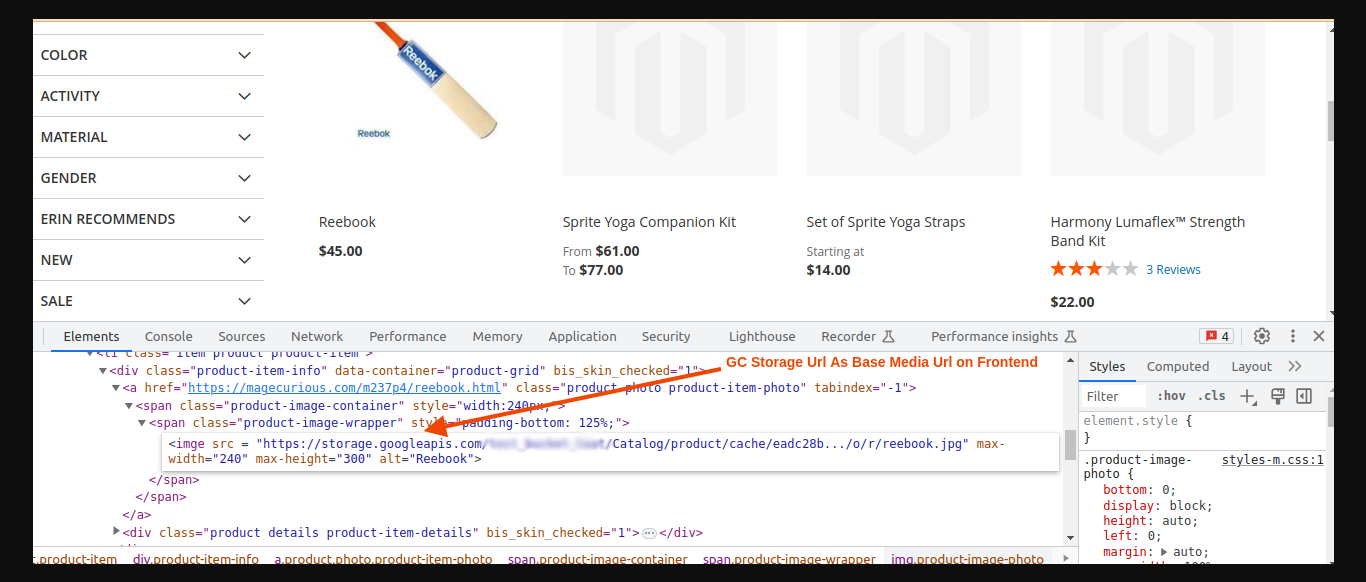
- GC Storage Url At FrontEnd Product List Page.
- GC Storage Url At Admin Downloadable Product Edit Page.

- GC Storage Url At Frontend My Downloadable Product Section.

Final Thoughts:
So this was the easiest way which we have told you in this blog. This is how you can install google cloud storage in Magento 2. Hope you liked the blog.
So quickly go to the comment box and tell me how you like this blog?
Stay tuned with us on our site to get new updates of Magento.
Thanks for reading and visiting our site.