
Hello Everyone,
In this blog, we will learn how to install the Ship Rocket integration extension in Magento 2.
This extension was approved by Magento Marketplace.
This extension is a unique Ecommerce shipping solution that gives access to multiple courier partners on a single platform. The Shiprocket Integration module is a solution for setting your shipping rates by distance. It can show shipping rates by entering a PIN code or location.
This extension allows for the printing of shipping labels, and packing slips, and automatically sending inventory and tracking information.
Without wasting your time, let us guide you straight away. Follow the easy steps given below to install the Magento 2 Shiprocket Integration extension and Configure it.
WHAT ARE THE FEATURES OF SHIPROCKET ?
- Enable or disable from Magento admin.
- Calculate distance by ZIP code.
- Unique code generated for pickup location.
- Easy to track order.
- Easy to print shipping labels.
STEPS FOR INSTALL SHIPROCKET INTEGRATION IN MAGENTO 2
STEP 1: Extract the downloaded extension package in your Magento root folder using FTP(File Transfer Protocol) Tools. For verification of the root folder, you can see some folders inside the Magento root folder like app, bin, lib,php server vendor, etc.
STEP 2: Next Need to run some Magento commands to install the extension in your system, so connect with your server via SSH go to the Magento root folder (e.g: cd /var/www/html/magento 243), and run the below commands one by one.
- php bin/magento setup: upgrade
- php bin/magento setup:static-content: deploy-f
- php bin/magento indexer: reindex
- php bin/magento cache: clean
- php bin/magento cache: flush
- chmod-R 777 var/ pub/ generated/
STEP 3: If your all commands run successfully then login to your system Admin Panel and go to Store > Configuration, if you see a new Tab in the left sidebar with the MageCurious Logo it means the extension installed successfully.
STEPS FOR CONNECT SHIPROCKET INTEGRATION WITH MAGENTO 2
STEP 1:- To configure the Shiprocket extension, navigate to Stores > Settings > Configuration > Sales > Delivery Methods > Shiprocket.

STEP 2:- In Shiprocket Configuration:
Enabled:- Select Yes so that Shiprocket shipping appears in the Shipping section at your customer’s checkout page.
Title:- Write down title for your shipping method
Method Name:- Write down Method Name for your shipping method
Price:- Set price for your shipping method
Calculate Handling Fee:- Set Handling Fee type Fixed/Percent.
Handling Fee:- You can enter the amount to pay for the Handling Fee.
Sort Order:- It’s the order in which the Shiprocket appears relative to other shipping methods on the checkout page.
Ship to Applicable Countries:- Customers from any country in the store configuration can use Shiprocket.
Ship to Specific Countries:- Only customers from the countries you choose can use Shiprocket.
Displayed Error Message:- If the customer chooses Shiprocket when this method is unavailable, this message will prompt the customer to choose another shipping method in Magento 2.
STEP 3:- In Shiprocket Configuration:

Note : Log in to Shiprocket now, and click on the link below to create your API user details.
Email:- Please write down the Shiprocket Authentication API email. Password:- Please write down the Shiprocket Authentication API password.
STEP 4:- In Pickup Location Configuration:
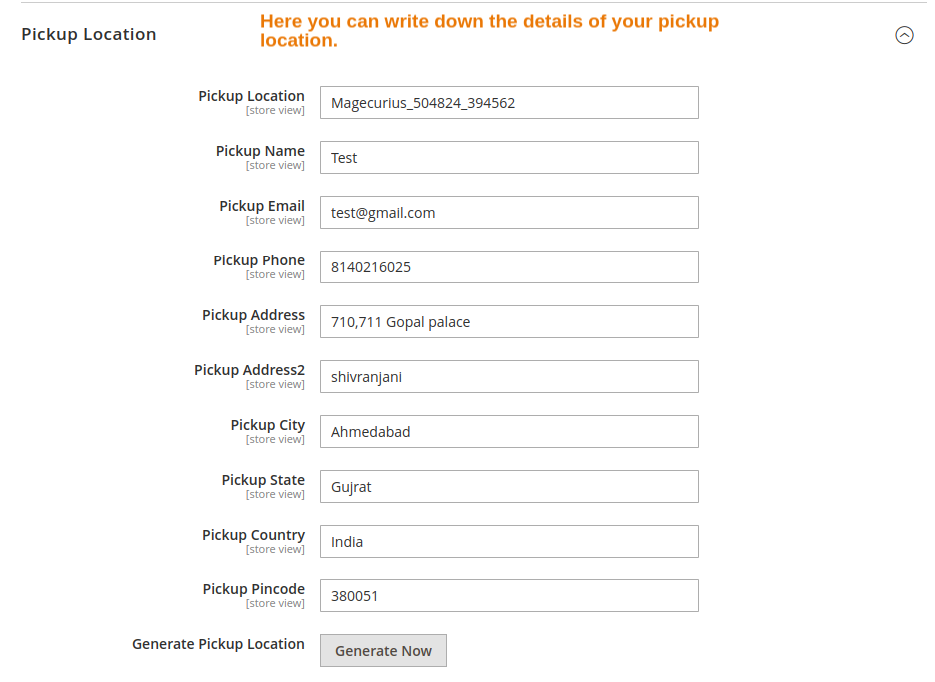
- Pickup Location : Fill in your unique pickup location code here.
- Pickup Name : Fill in your pickup location name here.
- Pickup Email : Fill in your pickup location email address here.
- Phone : Fill in your pickup location phone number here.
- Address : Fill in your pickup location address here.
- Address2 : Fill in your pickup location another address line here.
- City : Fill in your pickup location here.
- State : Fill in your pickup location state here
- Country : Fill in your pickup location country here.
- Pincode : Fill in your pickup location Pincode here.
- Generate Pickup Location : Click this button to generate the unique pickup location code.
Note : In order to generate a unique pickup location code, please save the pickup location configuration after clicking “Generate Pickup Location.”
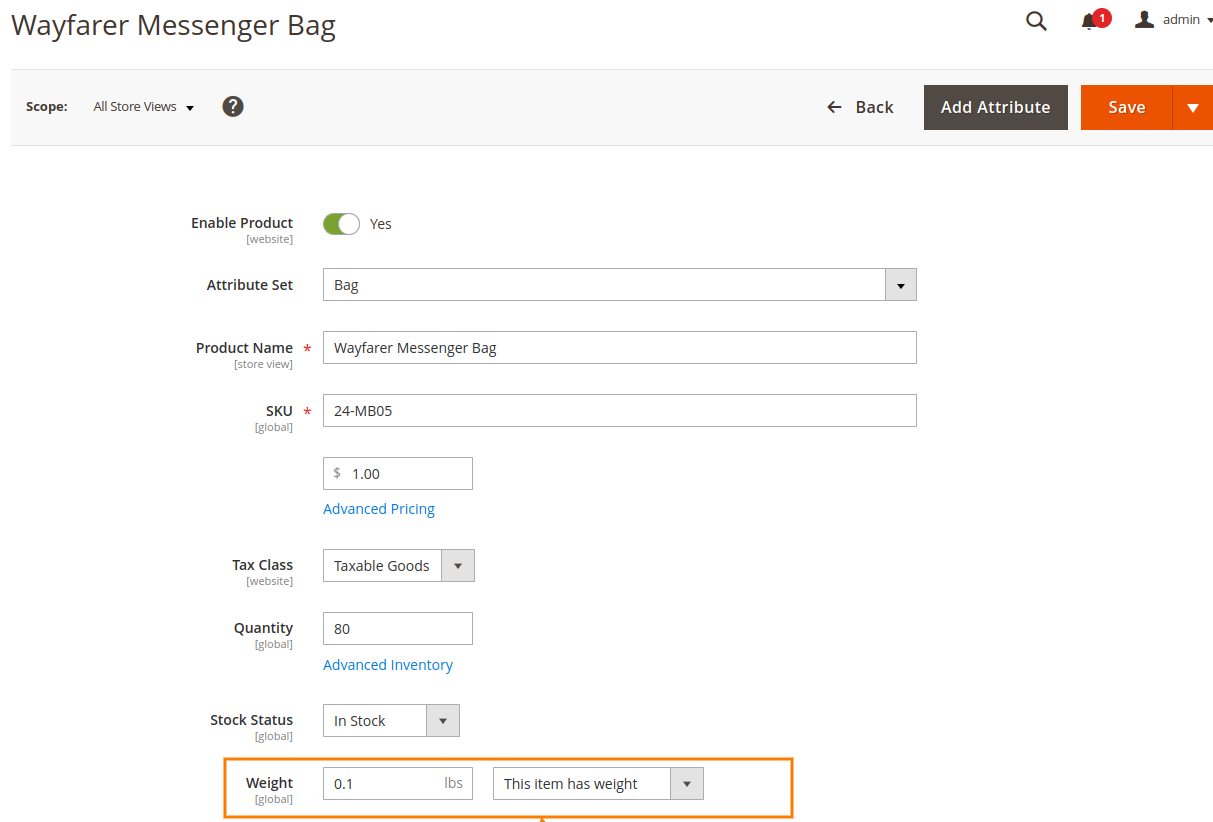
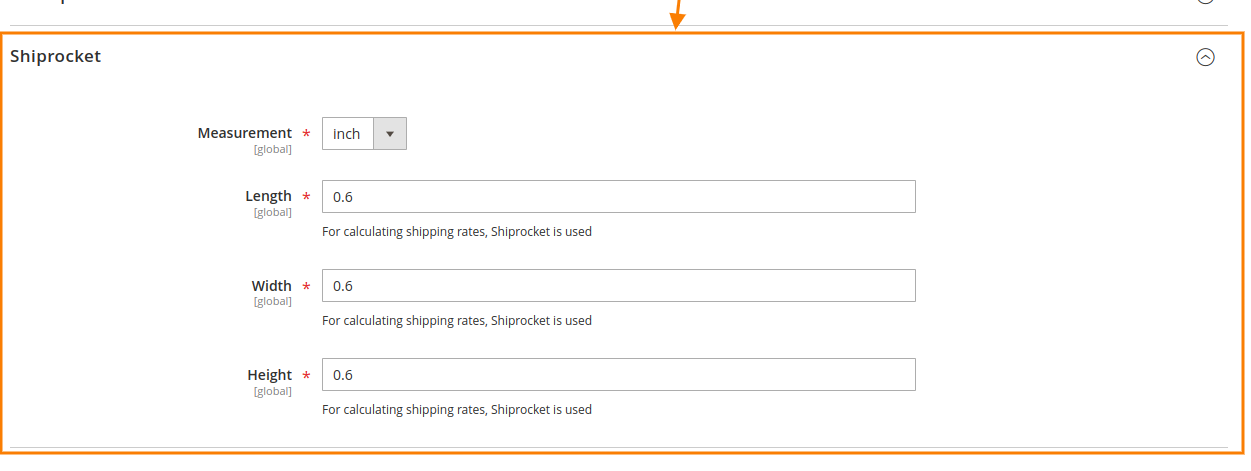
STEP 5:- In Catalogue Products :
Go to Catalog > Products and add or edit a product. Please enter the selected product’s weight, measurement, length, width, and height for the shiprocket shipping method.
STEPS FOR IN THE FRONTEND SHIPROCKET:
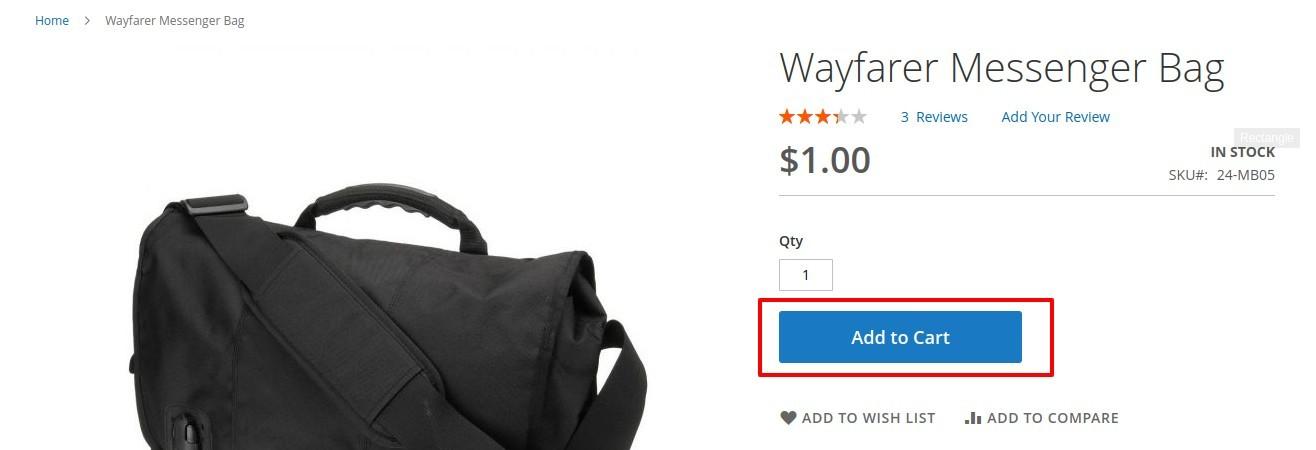
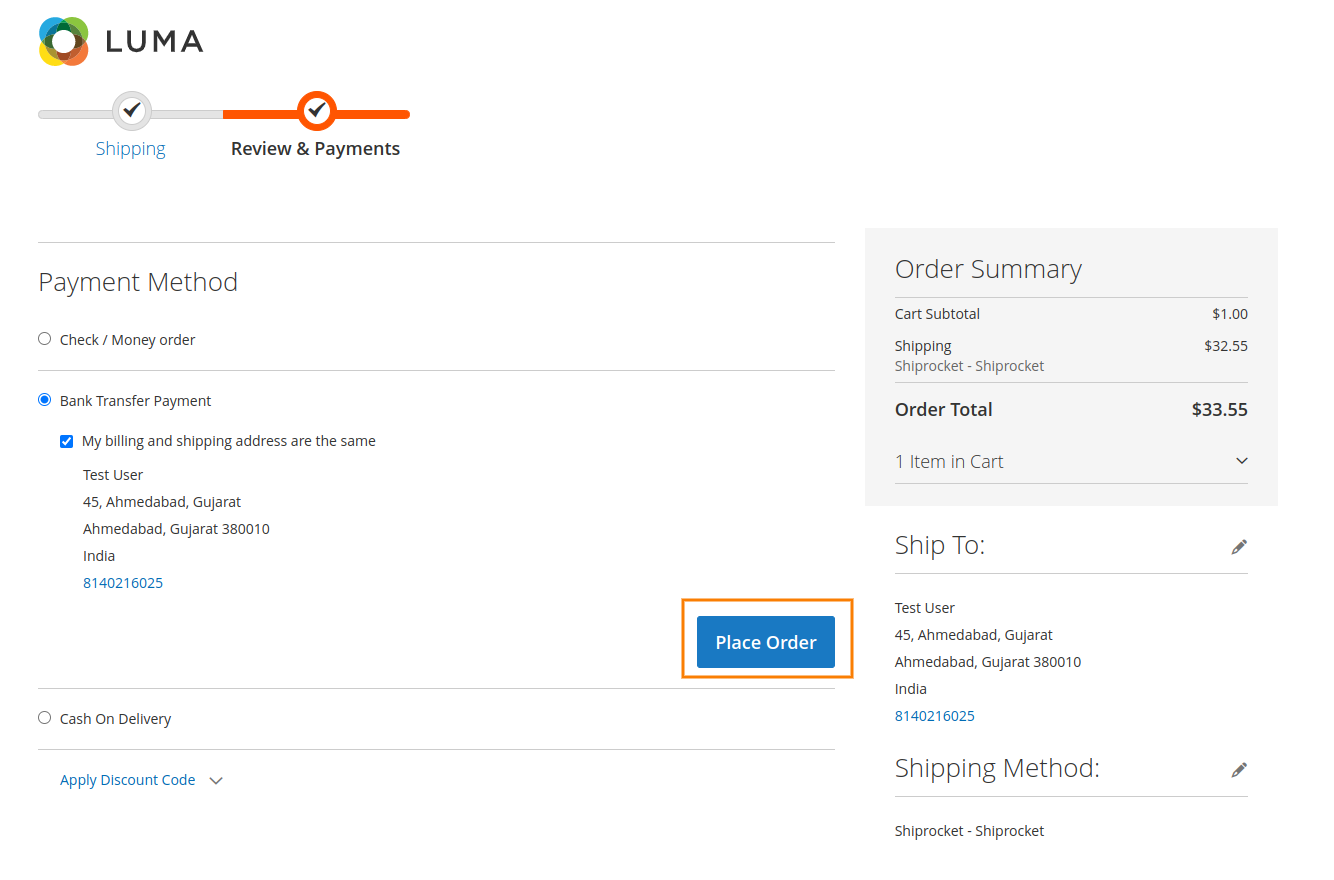
- Go to your frontend website site and create a new user so you can log into your website, or if you’ve already exited your customer account, login directly to your website. Now add the product to your shopping cart and go to the checkout page and use the shiprocket shipping method.
- Note : This shiprocket shipping option is also available to non-logged users.

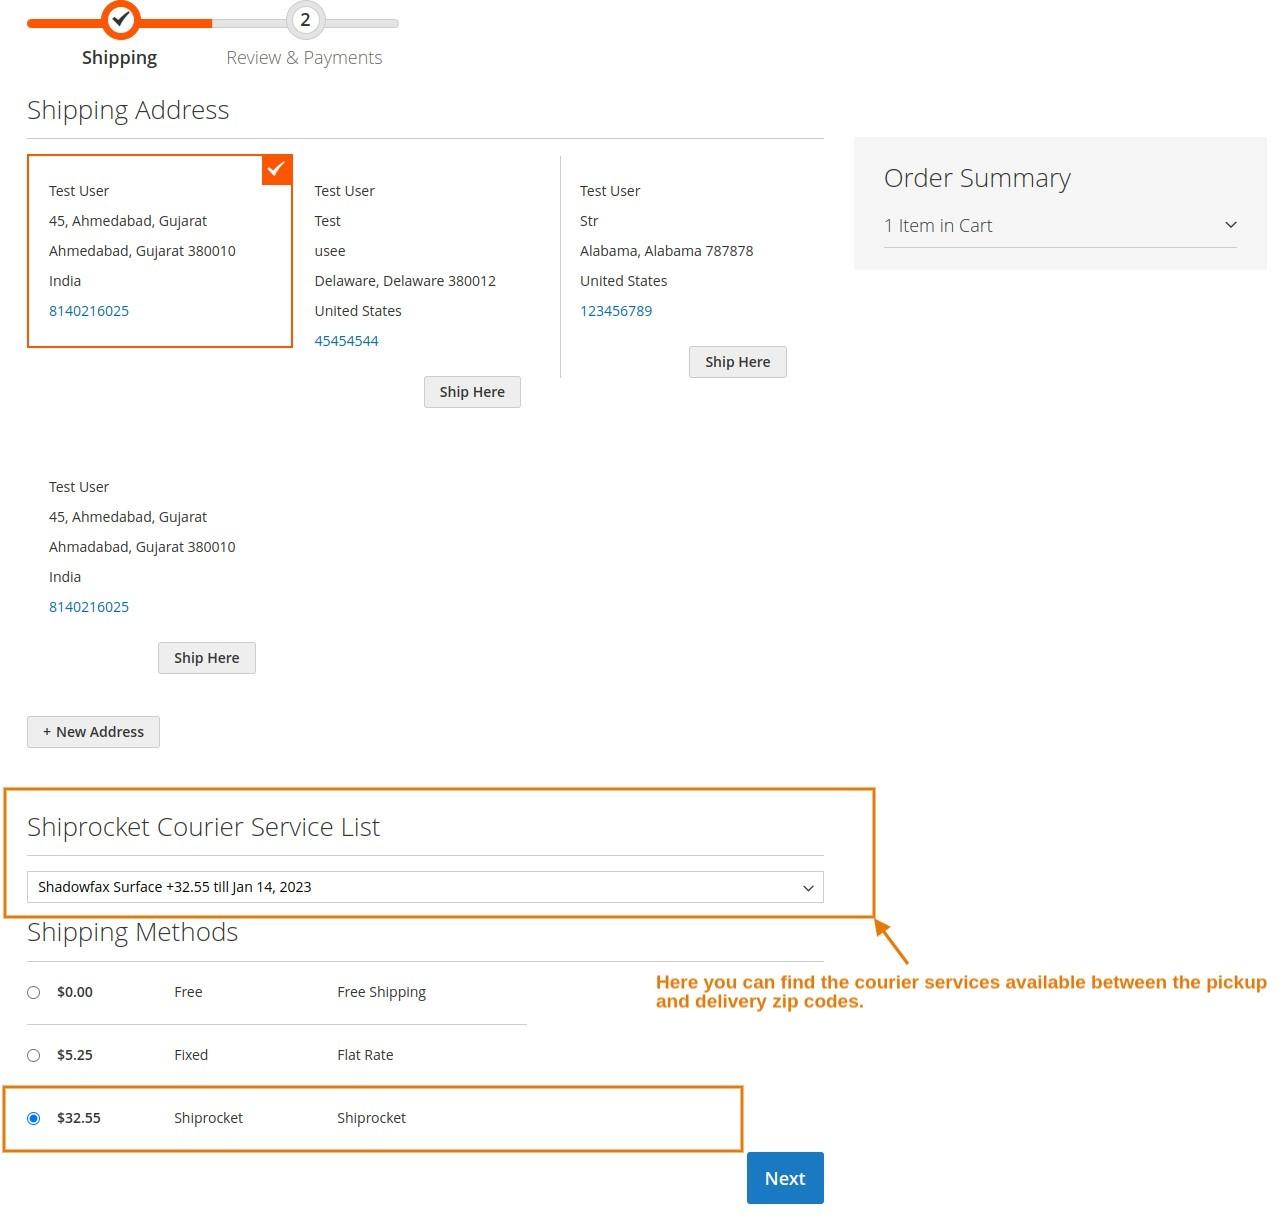
- Shiprocket courier services list and shipping method will be displayed on the checkout page based on the distance between pickup and delivery zip codes.
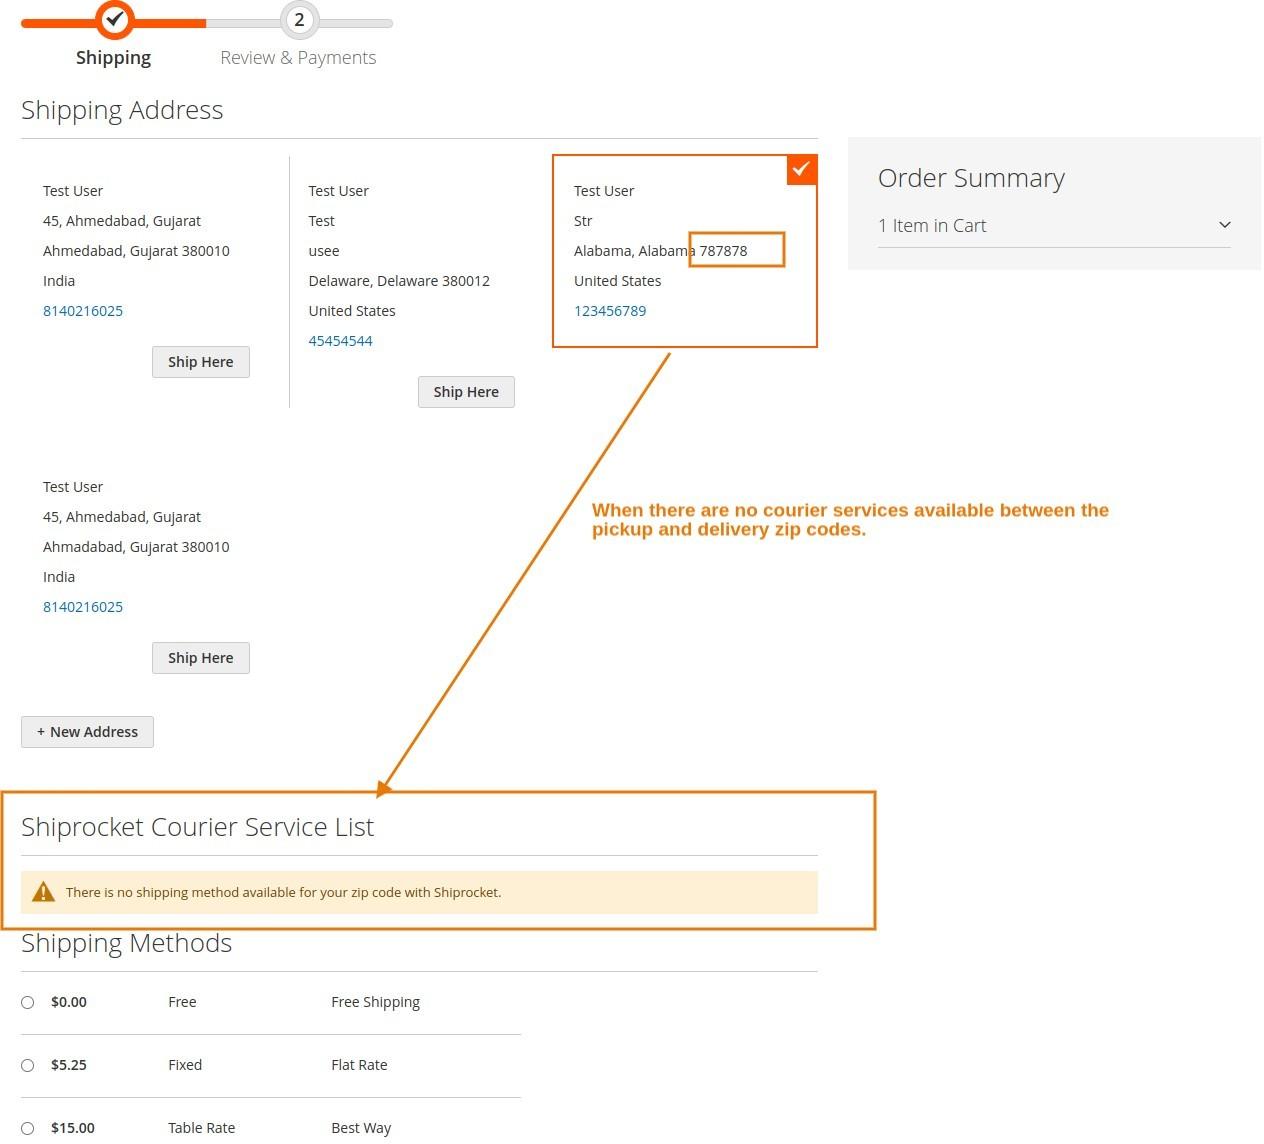
- When courier services between the pickup and delivery zip codes are not available, the shiprocket shipping method does not display on the checkout page. In addition, the user will see some notice messages.
- Please place your order using the “Place Order” button after selecting.
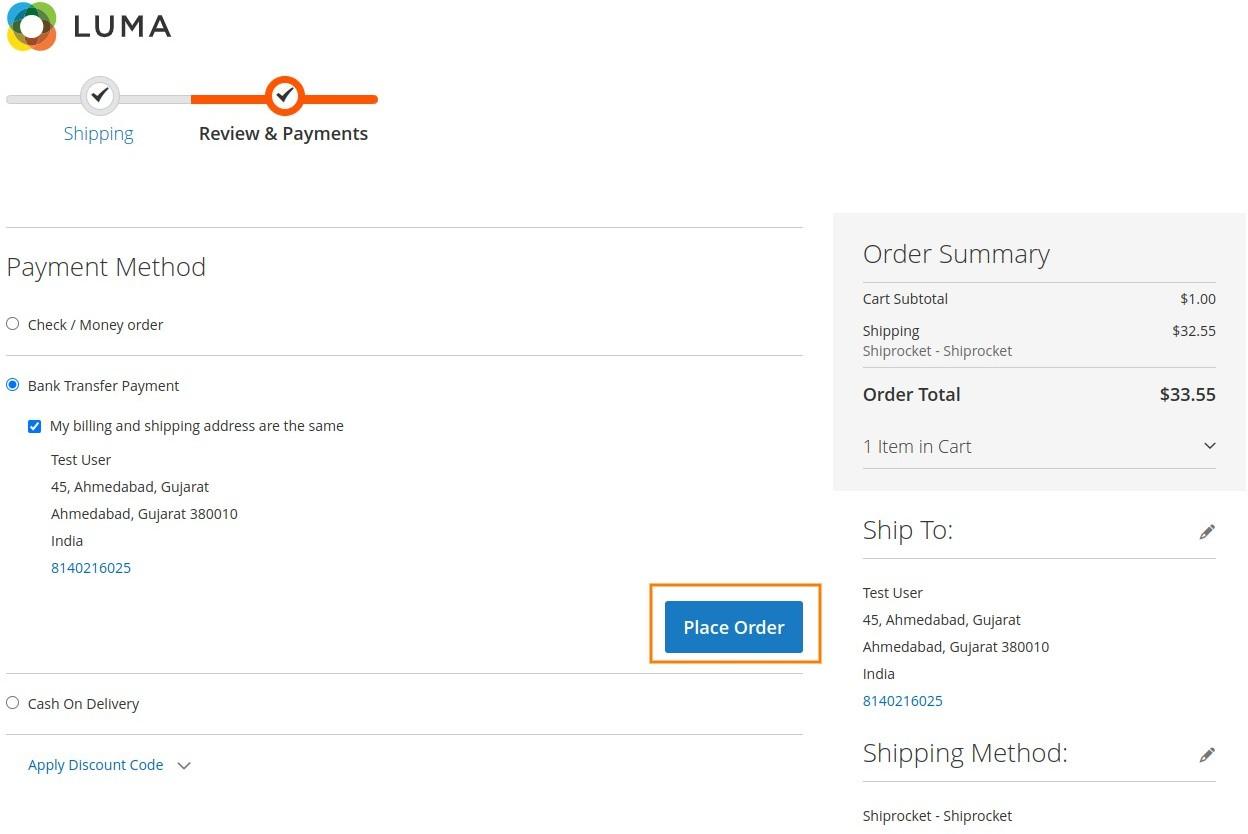
- one of the Shiprocket courier services and shipping method (Shiprocket).
- Once the order has been placed, go to the backend and log in.
STEPS FOR IN THE BACKEND SHIPROCKET:
- Create new orders in your Shiprocket account.
- From the Admin Panel, go to Sales -> Orders -> View Order , choose the When you click on “Order Sync,” it creates new orders in your Shiprocket account.
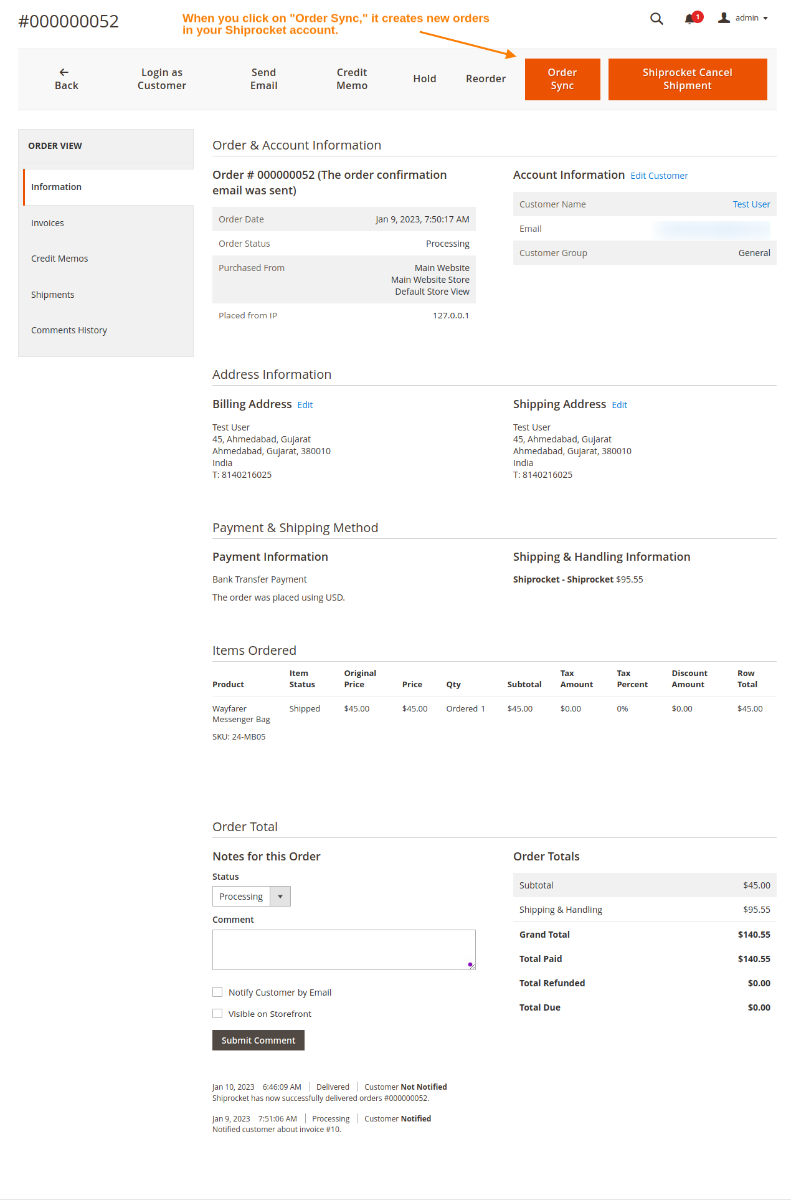
- When you click on “Order Sync,” it creates new orders in your Shiprocket account. In addition, orders, invoices and shipments will be generated in Magento and notified to customers.
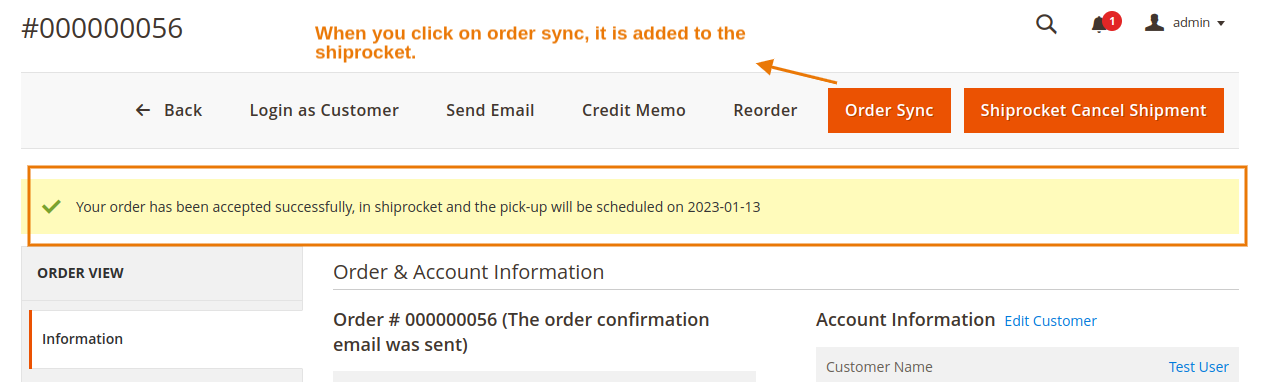
- In Shiprocket, when an order sync occurs, a shipment is generated and the user and admin can track it.
Orders Tracking
- From the Admin Panel, go to Sales -> Orders -> View Order, choose the order. Now go to the shipment tab and view the shipment.
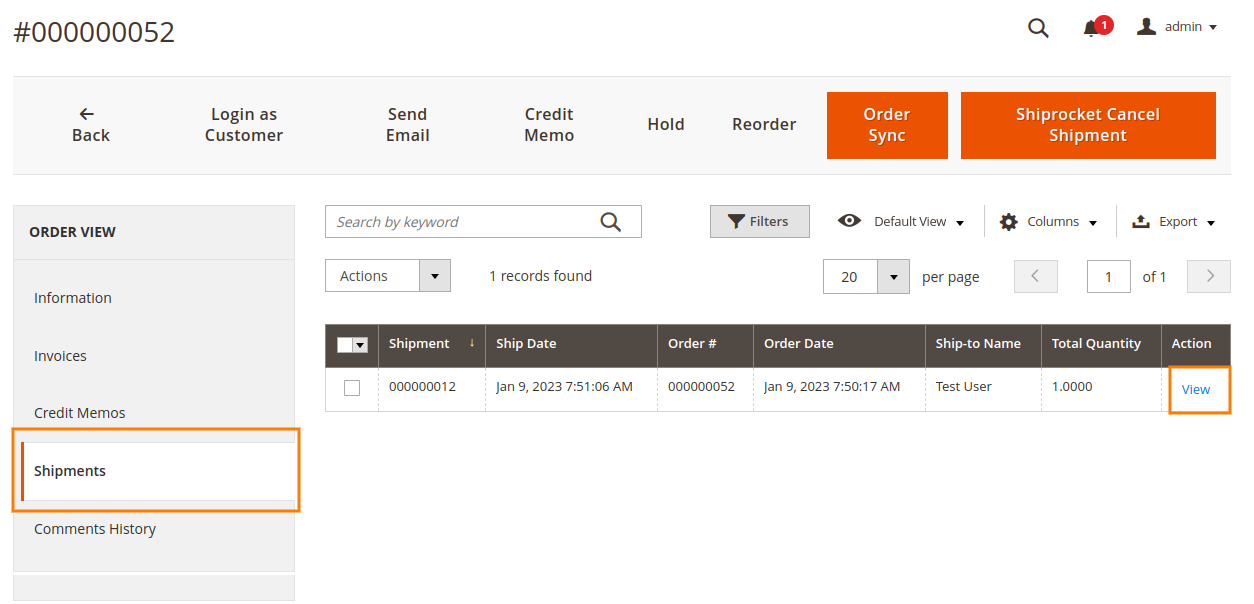

- Now track the shipment by clicking on “Track this shipment” or the tracking number.
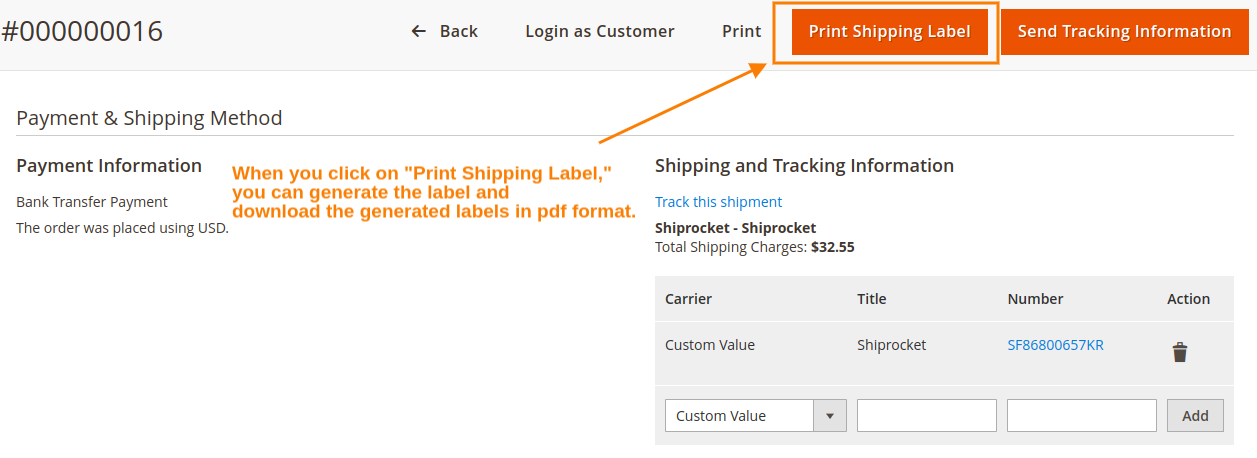
Print Shipping Label
- From the Admin Panel, go to Sales -> Orders -> View Order, choose the order, Now go to the shipment tab and view the shipment.
- When you click on “Print Shipping Label,” you can generate the label and download the generated labels in pdf format.
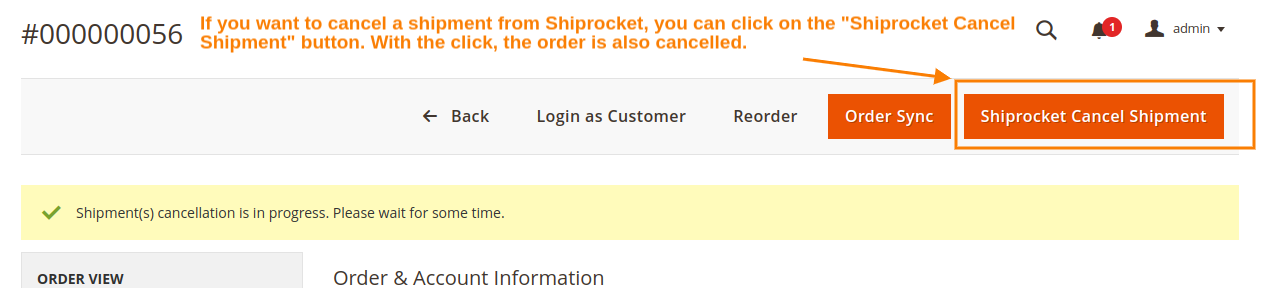
Shiprocket Cancel Shipment
- From the Admin Panel, go to Sales -> Orders -> View Order , choose the order, If you want to cancel a shipment from Shiprocket, you can click on the “Shiprocket Cancel Shipment” button. With the click, the order is also cancelled.
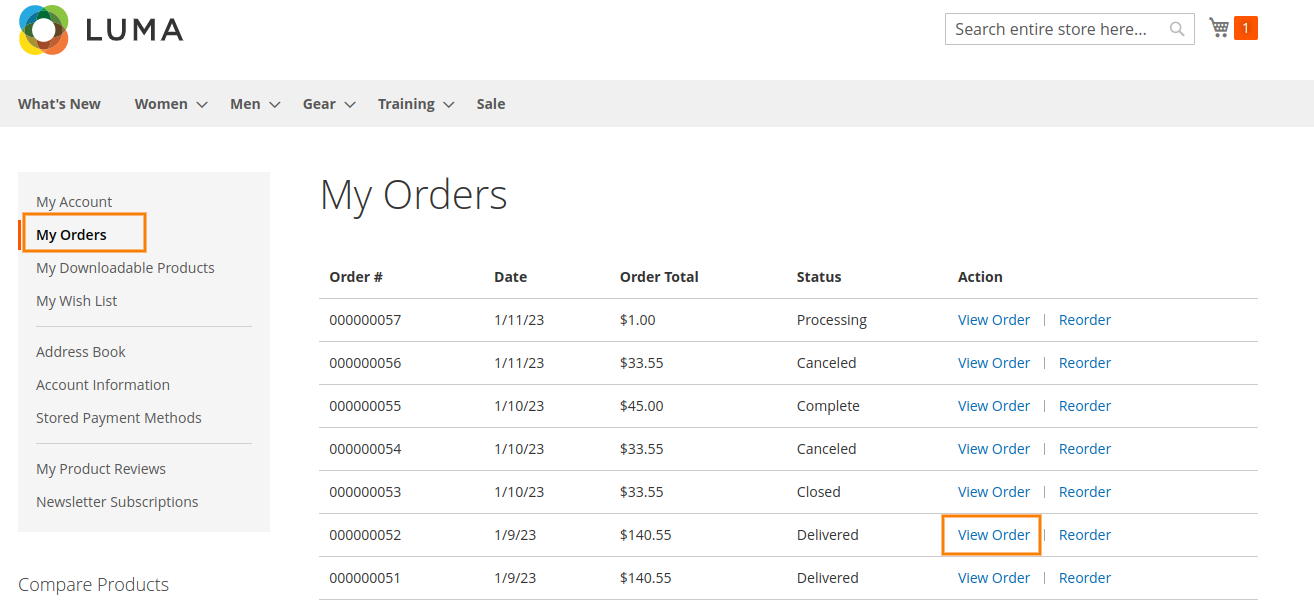
STEPS FOR IN THE FRONTEND ORDERS TRACKING FOR CUSTOMERS
- Customers can track their order if they login to your website; if they have a customer account, there is a “My Orders” tab available; please click on that tab to view the order. If order shipments have been generated, you will see an “Order Shipments” tab available when viewing orders; please click on that to access a tracking link.
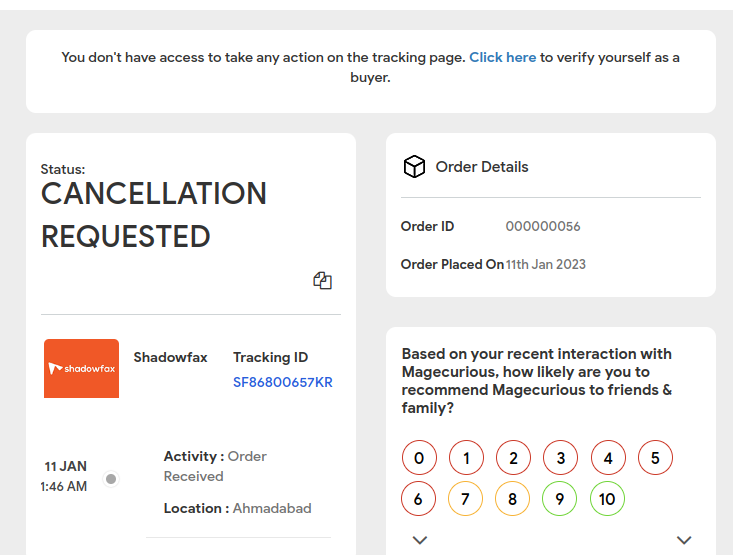
- Now track the shipment by clicking on “Track this shipment” or the tracking number.
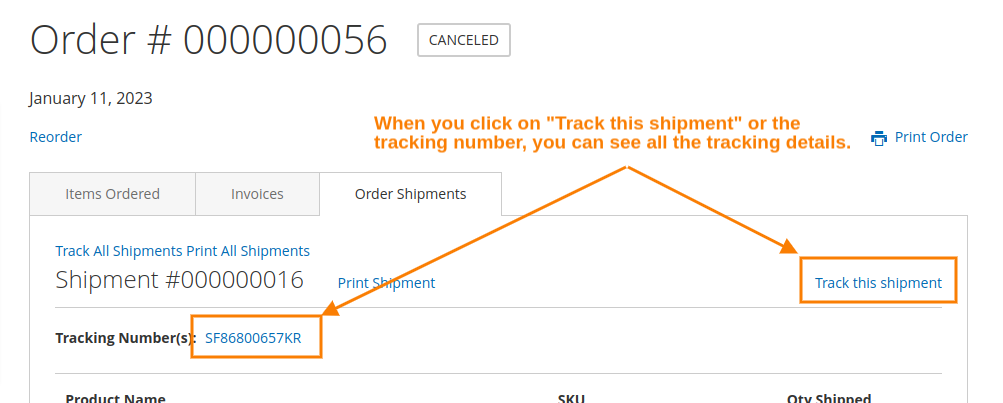
- Clicking “Track this shipment” displays the tracking information as shown.
Final Thoughts:
So this was the easiest way which we have told you in this blog. This is how you can install shiprocket integration in Magento 2. Hope you liked the blog.
So quickly go to the comment box and tell me how you like this blog?
Stay tuned with us on our site to get new updates of Magento.
Thanks for reading and visiting our site.